Server Sent Events - Concept

This post describes basics of 

  • SSE concepts, 
  • SSE use cases, 
  • How does SSE work,
  • Message Formats,
  • SSE code on Client side and Server side
  • SseEmitter connection keep alive time,
  • Auto Re-connect mechanism

If you already know basics concepts, please refer to my post on 
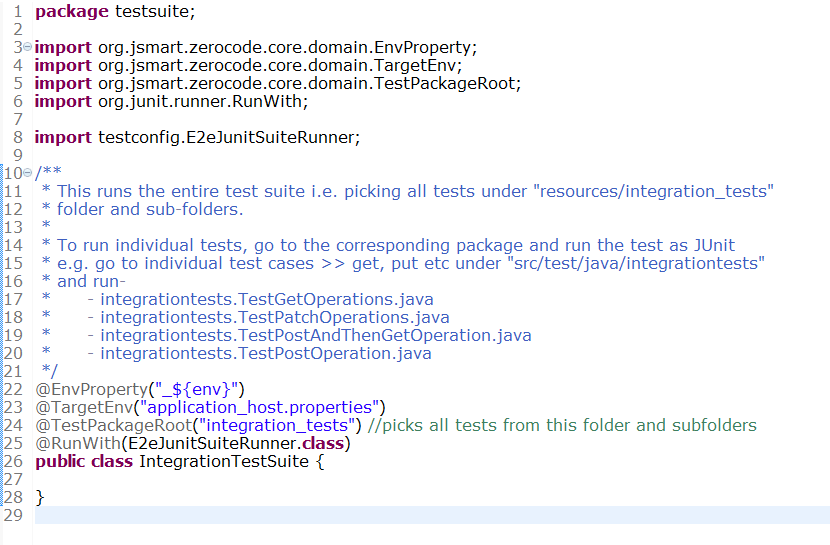
Server Sent Event - Development and Test Automation, which completely focused on E2E SSE development and addressing the challenges of testing SSE, preciously on how to automate SSE automation tests.

As always, you could refer to code here from my git hub account at  BeTheCodeWithYou  and refer to repository Spring-Boot-SSE

Please give star to the repo if you liked it :-)

Alright, so, with this post let's continue to talk on SSE basics

SSE Concept:-
Server Sent Events are the events ( data ) sent from server to the client over HTTP connection.

This connection is one directional connection from server to client. Meaning that, once the client connects to server, then there after server will send 
any real-time notifications generated on the server side, to the client.

Client can be mobile app or browser based app, or any client that support HTTP Connection.

SSE use cases:-
you would have seen SSE use cases around you in day to day life

1) Continuous update about train time notifications on the display panel on the platform.
2) Continuous Rolling of Stock updates
3) Real time counter increment of your social media 'likes' icon.
and could be more...

How does SSE work:-
Client initiates a connection to server over http, this can be done by "client calling a rest end point on the server, in return, the response should have content-type header values as "text/event-stream". 

This tells the client, that a connection is established and stream is opened for sending events from the server to the client.

In the browser you have a special object called,  "EventSource", that handles the connection and converts the responses into events. 

Message-Formats:-
SSE only supports text data. Meaning, server can only send text data to the client.
Binary streaming, while possible, is inefficient with SSE. In that case, WebSocket would be good choice for binary data transfer.

SSE code on Client side and server side:-

Client Side Code
EventSource object is the core object supported by browser. 
To open a connection to the server, client will need to instantiate EventSource object.
const eventSource = new EventSource('http://localhost:8080/subscribe/'); 

Browser sends this GET request with accept header text/event-stream. 
The response to this request, must contain header content-type with 
value text/event-stream and response must be encoded with UTF-8.

To process these events in the browser an application needs to register a listener for the message event. 

The property data of the event object contains the message

eventSource.onmessage = event => {
  const msg = JSON.parse(event.data);
  // access your attributes from the msg.
};

Client api supports certain events like open and error. 

Open event occurs as soon as 200 response is received by client for /subscribe GET call.

error event is received by client, when there is any network error or server terminates the connection.

Server Side Code
Http Response to the above GET request on /subscribe end point must contain the Content-Type header with the value text/event-stream.

Spring Boot supports SSE by providing SseEmitter object. It was introduced in spring version 4.2 ( spring boot 1.3 ).

Create a spring boot application from start.spring.io and select web as dependency.

You can have a controller with rest end point GET with /subscribe allows client to establish connection.

Another rest end point POST with /event allows us to submit new events on the server. 
This POST with /events or similar end point, can be called from any other server side component to send real time notification.

This /event end point, will then send event to connected clients.

Each client connection is represented with it's own instance of SseEmitter.

One limitation with spring SSE is , it does not give you tools to manage 
these SseEmitter instances. So, for this example, I have used a list that stores SseEmitter objects and release objects on errors, completion or timeout scenarios.

SseEmitter object is created as below

SseEmitter emitter = new SseEmitter();

SseEmitter connection keep alive time:-

By default, Spring Boot with the embedded Tomcat server keeps the SSE HTTP connection open for 30 seconds. 

we can override this 30 seconds via configurations.

spring.mvc.async.request-timeout=50000

this entry will keep the HTTP connection open for 50 seconds. 

Alternatively, you can directly use SseEmitter constructor to pass this timeout value as below


SseEmitter emitter = new SseEmitter(150_000L); 
//keep connection open for 150 seconds

Auto Re-connect mechanism

The nice thing about Server-Sent Events is that they have a built in re-connection feature. Meaning that, if the connection is dropped due to server error then client will automatically tries to re-connect after 3 seconds. 

The browser tries to send reconnect requests forever until he gets a 200 HTTP response back.

It's a browser feature to wait for 3 seconds and then automatically reconnect. 
This 3 seconds of time can be changed by the server by sending a new time value in the retry header attribute together with the message.


A client can be told to stop reconnecting using the HTTP 204 No Content response code.

Hope you liked this basic concept walk through of SSE. 
Please follow reading on the next post on Server Sent Event - Development and Test Automation

Server Sent Events - Development & Test Automation

This post is a next part of the my earlier post SSE basics. 
In this post, I will get into SSE code and how we can automate it's testing.

Please refer to my github account at BeTheCodeWithYou and clone the repository Spring-Boot-SSE to directly run the application.

please give repo a star if it did help you ✌️

The need of creating this repository was apparent due to SSE Test challenges and I couldn't find anything fitted together!!

So, think about if you have a client connected to server over SSE but how do you make sure that your client or clients are getting events which are generated on the server and essentially how do you automate this test?? 😨

Important point to understand is that, here we are testing our server side components to make sure that it is able to send events to all the connected clients and able to release sse emitter objects when clients have initiated connection close. We have simulated the client ( UI )  with java library so that we can automate this approach.  👊

In your application code, you will have client code which will make use of browser supported EventSource object to establish SSE connection with server.
To test it, you will normally open browser, making a connection to SSE channel and then wait for the push notification to receive on the browser when an event is triggered on the server.
To test with multiple clients, you might open multiple browsers and do the same tests.
Challenges with this manual tests of SSE are:-
  • can you automate this test behaviour? :confounded:
  • can you assert that message received by the client is correct? :flushed:
  • can you run this test steps with any build tools? 🏃
  • could be more ....
To solve this challenge, I thought that it would be nice I find a java equivalent of EventSource object, so that I can write a client ( java based and not the browser ) that establish SSE connection. But then the next issue was, how do I assert because without which test is not complete!!

So, I found an open source library which support java equivalent of EventSource Object.
For Test automation and Assertions, I used ZeroCode TDD framework, which allows easiest way of calling a REST end point and importantly directly calling a java method and asserting what you expected.

Let's see in SSE in Action ☀️ running the tests


I approached this by creating gradle multi module project with Spring Boot.

Project code consists of below framework and libraries,

gradle
Spring Boot
Sprint REST API

In the multi module gradle project, I have got 3 projects

see-client
sse-server
see-test-automation


Project structure setup


Sse-client

Project setup


 Establish a SSE connection to REST endpoint exposed by sse-server project. This is achieved with EventSource java object .

This project has ClientEventHandler which overrides a onMessage method. When server push an event, onMessage method gets invoked and you can retrieve message here.

For simplicity, I have just added sse-client project code into sse-test-automation project, but you can always define dependencies of sse-client into sse-test-automation project as well.

sse-server - in action

click to open on gif, it doesn't run


This project exposes two rest end points.
/subscribe for allowing client to establish SSE connection.
    @GetMapping("/subscribe")
    public SseEmitter subscribeForEvents() {
     ...
    }
/events for triggering events on the server, which in turn publish events to subscribed clients.

@PostMapping("/events")
    public void pushNewEventsToClients(@RequestBody String eventData) throws IOException {
     ...
    }

sse-test-automation

project Setup


This module automates three activities together
a) client subscription for SSE connection,
b) triggering message on the server, and
c) asserting if the client has received the published events.

sse-test-automation project is the key of part of this repository, because that's the whole purpose of creating this repository to talk about SSE automation testing.
Assertions
As soon as client receives a message, in ClientEventHandler class, onMessage method gets called and there I am adding the message data received in the HashMap.
and then i have written a public method which returns size of the map.
See this code of file event_publish.json, how assertions is achieved.
Creating multiple Clients for SEE connection 
This is achieve with the help of ZeroCode framework, which allows to create parallel threads. Refer to file parallel_load.properties
number.of.threads=3  ( to launch 2 clients and 1 server thread )
ramp.up.period.in.seconds=5  ( launch these 3 thread in gap of 5 seconds )
loop.count=1 ( do it once, so you will have total 3 threads )
How to RUN
I have created a TestSuite class, which does everything for us!!
It reads the paralle_load.properties and then create client 1 which connects to the server over SSE. 
It then creates another client, client 2 which connects to server over SSE.
It then push message on the server side by calling REST end point.
Refer code here  for TestSuite.java


Kotlin dev - Spring Boot REST API with Kotlin

Let's talk about Kotlin in this article. I have been reading on Kotlin since last few weeks, so wanted to code in Kotlin to actually feel the difference in compared to java code.

Finally, developed a very simple REST API in Kotlin with Spring Boot + Spring Data + H2 in memory DB. 
Kotlin and Spring Boot play well together.

You will also notice in the Code Walk through section that, there is NO controller, NO service class in the project!! That's magic of spring's @RepositoryRestResource. I explained below in details.

I will try to write down my notes, on what I have learnt so far in Kotlin as on day 0.

I have no experience on Kotlin but what I read and looked into the Kotlin code on github projects, this is definitely to practice on.

An obvious question, you would ask is, Why Kotlin?

In short,
Why Kotlin


  • Kotlin compiles to bytecode, so it can perform just as well as Java.
  • More succinct than Java.
  • Kotlin's Data classes are clearly more concise than Java's value classes.
  • Classes are final by default which corresponds to Effective Java Item 17. You would need to explicitly put open if you want to make class inheritable.
  • Abstract classes are open by default.
  • One of Kotlin’s key features is null-safety - which cleanly deals with null values at compile time rather than bumping into the famous NullPointerException at runtime. 
  • Primary constructor vs. secondary constructors. If you need more than one constructor then only you would go for secondary otherwise most of the Kotlin class would have primary constructor.
  • Kotlin can also be used as a scripting language.
  • Kotlin and Java are inter-operable, so it's easy to do a trial of Kotlin on just a small part of your codebase.
  • Kotlin uses aggressive type inference to determine the types of values and expressions for which type has been left unstated. This reduces language verbosity relative to Java.
  • Kotlin is fully supported by Google for use with their Android operating system.

Two points below, reference from Wiki:

  • According to Jetbrains blog, Kotlin is used by Amazon Web Services, Pinterest, Coursera, Netflix, Uber, and others. Corda, a distributed ledger developed by a consortium of well-known banks (such as Goldman Sachs, Wells Fargo, J.P. Morgan, Deutsche Bank, UBS, HSBC, BNP Paribas, Société Générale), has over 90% Kotlin in its codebase.
  • According to Google, Kotlin has already been adopted by several major developers — Expedia, Flipboard, Pinterest, Square, and others — for their Android production apps.


Code walk through

Project code is on my Kotlin Github Repo , which is a simple REST API using Kotlin and Spring Boot

Clone - https://github.com/BeTheCodeWithYou/SpringBoot-Kotlin.git


  • Kotlin
  • Spring Boot
  • Spring Data
  • H2 in-memory DB
  • Gradle


Understanding build.gradle


org.jetbrains.kotlin:kotlin-gradle-plugin - 

compiles Kotlin sources and modules.

org.jetbrains.kotlin:kotlin-allopen

This is interesting part here. In Kotlin, by default all classes are final
Now, in order to make a class inheritable, you have to annotate with open keyword. 
And the problem is, lot of other libraries like Spring, test libraries ( Mockito etc ) requires classes and methods to be non-final. In Spring, such classes mainly to include @Configuration classes and @Bean methods.

Rule is simple, you need to annotate @Configuration and @Bean methods to mark them open but this approach is tedious and error-prone, hence Kotlin has come up with compiler plugin to automate this process through this dependency.

org.jetbrains.kotlin:kotlin-noarg  and 
apply plugin: 'kotlin-jpa'

In order to be able to use Kotlin immutable classes, we need to enable Kotlin JPA plugin. It will generate no-arg constructors for any class annotated with @Entity


apply plugin: 'kotlin'
To target the JVM, kotlin plugin needs to be applied.

apply plugin: 'kotlin-spring'
Required for Spring Kotlin integration

Compiler options

Spring nullability annotations provide null-safety for the whole Spring Framework API to Kotlin developers, with the advantage of dealing with null related issues at compile time and this feature can be enabled by adding the -Xjsr305 compiler flag with the strict options.

and also, configures Kotlin compiler to generate Java 8 bytecode.

compileKotlin {
kotlinOptions {
freeCompilerArgs = ["-Xjsr305=strict"]
jvmTarget = "1.8"
}
}

compile("org.jetbrains.kotlin:kotlin-stdlib-jdk8")
Is the Java 8 variant of Kotlin standard library

compile('com.fasterxml.jackson.module:jackson-module-kotlin')
Adds support for serialization/deserialization of Kotlin classes and data classes.

compile("org.jetbrains.kotlin:kotlin-reflect")
Is Kotlin reflection library

Spring Boot Gradle plugin automatically uses the Kotlin version declared on the Kotlin Gradle plugin, hence the version is not defined explicitly on the dependencies section.

All remaining entries are self explanatory.

Kotlin Coding

Spring Boot Application

/src/main/kotlin/
  
  com.xp.springboot.kotlin.SpringBootKotlinRestApiApplication.kt

Notice that, missing semicolon.
You need open and close braces of class only if you have @Bean otherwise just a class with name is required.
runapplication is a top level function.


Creating Data Class

Then we create our model by using Kotlin data classes which are designed to hold data and automatically provide equals(), hashCode(), toString(), componentN() functions and copy().

Also, you could define multiple entities in the same data class.

var is like general variable and its known as a mutable variable in kotlin and can be assigned multiple times.
There is another type val, is like constant variable and its known as immutable in kotlin and can be initialized only single time and moreover, val is read-only and you are not allowed to explicitly write to val.


Creating a Repository

Yes, just the one liner to define repository interface with spring data curd repository.

The interesting spring annotation here is RepositoryRestResource.
This comes by adding spring-boot-starter-data-rest dependency.


If you would have noticed, there is NO Controller , NO Service and this project is exposing below REST endpoints with HATEOAS enabled.

GET - http://localhost:8080/parkrun/runners
POST - http://localhost:8080/parkrun/runners
GET - http://localhost:8080/parkrun/runners/2
DELETE - http://localhost:8080/parkrun/runners/1


It's the magic of @RepositoryRestResource.
Apply collectionResourceRel to define custom resource label else annotation will use default as per the model class name ( /parkRunners ).

At runtime, Spring Data REST will create an implementation of this interface automatically. Then it will use the @RepositoryRestResource annotation to direct Spring MVC to create RESTful endpoints at /parkRunners.


Running the Application

Once you have the jar ready after gradle clean bulid. Just run the app using

java -jar SpringBootKotlinRestAPI-0.0.1-SNAPSHOT.jar

and hit the below url

http://localhost:8080/parkrun

Response:

{
    "_links": {
        "runners": {
            "href": "http://localhost:8080/parkrun/runners"
        },
        "profile": {
            "href": "http://localhost:8080/parkrun/profile"
        }
    }

}

Hit the url http://localhost:8080/parkrun/runners on GET

Response:


{ "_embedded": { "runners": [ { "firstName": "NEERAJ", "lastName": "SIDHAYE", "gender": "M", "runningClub": "RUNWAY", "totalRuns": "170", "_links": { "self": { "href": "http://localhost:8080/parkrun/runners/1" }, "parkRunner": { "href": "http://localhost:8080/parkrun/runners/1" } } } ] }, "_links": { "self": { "href": "http://localhost:8080/parkrun/runners" }, "profile": { "href": "http://localhost:8080/parkrun/profile/runners" } } }


Hit the profile url and see what you get

http://localhost:8080/parkrun/profile/runners

{ "alps": { "version": "1.0", "descriptors": [ { "id": "parkRunner-representation", "href": "http://localhost:8080/parkrun/profile/runners", "descriptors": [ { "name": "firstName", "type": "SEMANTIC" }, { "name": "lastName", "type": "SEMANTIC" }, { "name": "gender", "type": "SEMANTIC" }, { "name": "runningClub", "type": "SEMANTIC" }, { "name": "totalRuns", "type": "SEMANTIC" } ] }, { "id": "get-runners", "name": "runners", "type": "SAFE", "rt": "#parkRunner-representation" }, { "id": "create-runners", "name": "runners", "type": "UNSAFE", "rt": "#parkRunner-representation" }, { "id": "patch-parkRunner", "name": "parkRunner", "type": "UNSAFE", "rt": "#parkRunner-representation" }, { "id": "get-parkRunner", "name": "parkRunner", "type": "SAFE", "rt": "#parkRunner-representation" }, { "id": "delete-parkRunner", "name": "parkRunner", "type": "IDEMPOTENT", "rt": "#parkRunner-representation" }, { "id": "update-parkRunner", "name": "parkRunner", "type": "IDEMPOTENT", "rt": "#parkRunner-representation" } ] } }


SonarCloud Integration with SpringBoot-Maven

In this article, I am writing up detailed steps on how you scan your code with SonarCloud by running maven sonar locally.

It's a very important phase, where we should configure sonar quality gates at very early stage of the development, so as to eliminate last time surprises! 

More importantly, the point is, if you do sonar configuration at later stage then  fixing sonar issues becomes more complex due to high code density and then you will have to perform more regression and integration tests to make sure that sonar fixes are not breaking existing functionalities. Hence, get sonar configured at early stage and FAIL FAST!

Let's get started,

1) SonarCloud Configuration

This involves below steps,

Creating an organization, 
Adding project to your organization,
Generating security token

Before you being, go to https://sonarcloud.io and create your account.

Once you logged in, follow below steps

Creating an organization

A)  On the top right, click on the + icon and select "Create New Organization"
B)  You will see screen as below, fill up the details and click "continue"


C)  On the next screen, select a free plan and click on "create organization"

D) You will see screen as below,


Adding project to your organization,


E) Click on "Create New Project" and on the next screen, you will have two tabs "select repositories" and "create manually"
 you can select your github repository or create project manually.

If you don't have your github project, that's fine, go ahead with selecting option, "Create Manually" and enter below details and click "Create"

Organization -  <Write org name, which we just created on step 1.B above >
Project Name - < any name you like>
Project Key-    < this will be value of groupId.artifactId from your pom.xml >


F) Once you create project into your organization, you will see screen as below.


Generating security token


 G) Click on "Configure Analysis" from above screen, and you will see below  screen


  H) Generate the token and then copy your token. On the next screen, you will see option to choose your project language and build technology.
Once you select maven or gradle, it will show your the command to run sonar with maven or gradle, which I have explained in below in "Using the Code" section.

This ends all your SonarCloud configuration, Let's move next and see how we can generate sonar report on the SonarCloud by running maven on local project. 

2) Using the Code 


Step 1:- Add sonar dependency
Go to your pom.xml and add the below plugin to enable SonarQube on your project.

<plugin>
      <groupId>org.sonarsource.scanner.maven</groupId>
      <artifactId>sonar-maven-plugin</artifactId>
       <version>3.3.0.603</version>
    <executions>
        <execution>
          <phase>verify</phase>
          <goals>
            <goal>sonar</goal>
          </goals>
        </execution>
             </executions>
</plugin>

Step 2:- Run below command to scan your code against the SonarCloud Server

 mvn clean verify -P sonar \
 -Dsonar.host.url=https://sonarcloud.io \
 -Dsonar.organization=<organization-name created on step 1.B above> \  
 -Dsonar.login=<token generated on step 1.G above>

Step 3: - Analyze maven output

You will see code is compiling and all your test cases running


Spring Application starting and running all the integration test cases written using ZeroCode framework.


All your test cases passed and now maven sonar plugin doing the magic and scanning your code against sonar rules.


You can see in highlighted text that, sonar sensors are running on the code, like JoCoCoSensorchecking Vulnerabilities, Java securitySenor etc etc.


Finally, you see build is success and you can see the report on the SonarCloud.


Notice now that, on the SonarCloud, you can see your project is now showing up the code quality metrics.  Just refresh your project on SonarCloud and see below metrics.


Click on the project and look into the details of the reported issues, 

Fix issues, run mvn sonar again on the local and when you see code is clean, then you are all good for commit->push.

Hope this helps. Leave your thoughts on the comments section.

Develop ZeroDefect API's with ZeroCode!

This post details about how you can configure your mindset and achieve possibility of developing and delivering zero defects API with TDD, Writing and automating Integration Test Cases along with Build pipeline strategy.

In projects, we always talk about code quality, and hence we scan our code against various tools like FindBug, SonarQube, we write unit test cases ( min 80% coverage ), we write Integration test cases, we apply profiling and etc etc.

We do all this setup, with a GOAL for achieving less number of defects with quality deliverable as much as we could. yeah?

Now, even after having these code quality gates in place, we still find defects, some basics defect which shouldn't be there at all,  contract related issues, integration issues, some of due to load/performance, some of due to memory issues and etc etc and It DOES happen!!

but WHY? In my experience so far, it may be due to following factors:-

Problem Statement


1) Involvement of QA at later stage. Normally they gets on boarded when you see your code integrated and working at least locally and ready to deploy on CIT or SIT, whatever.

2) Less focus on writing Integration Test cases in the BEGINNING.

3) Automation of Integration Test cases.

4) Takes time to correct/update integration test cases when defects comes because we introduced integration test cases at later stage!

5) Load and performance Testing kicks-In at very later stage.

6) Application Profiling kicks-In at later phase when testers reports issues.
You might have more points to add and in-fact you would have addressed few of them at right time but in general this is what we see happening!

In order to find solution of those 6 points listed above, please have a read on the below approach and the framework I have used in sample project code to make it possible. I am sure, you would easily map solutions to above points when you read on below.

Solution Approach - Code & Automate Integration Test Cases


Once your API’s contract are ready (probably draft is also perfect, because design gets evolve as you move on, so don't wait! )

1) Involve QA in the BEGINNING and make them comfortable with API contracts with the same comfort as of Developers. 

2) Create Two projects of each API’s.
    a)  "API Build" - Project with implementation of API’s contracts practicing TDD with unit tests. Developers own this.

    b) "API Integration Test" - Project with Integration Test Cases.
     Writing JSON part of this project will be owned by QA and JAVA part will be owned by developers,.
   You will see below, how QA can contribute in writing up integration test cases from day 1!
    Java developer will focus on mocking up external API calls and boundaries of the system 

( when external api’s or boundary systems are not ready to integrate ).

 Later, you will just switch same test cases to run against actual test env of boundary systems/api’s. 

3) Setup two Jenkins build jobs for each API ( “API Build” and “API integration Test”) because I don’t want my API Build project failure because of API Integration Test project failure hence the separation. Make sense?

4) Develop both of these projects in parallel - It would be obvious that API Integration Test project will finish sooner with basic integration test cases in place and hence eventually you will end up building TDD on your Jenkins build.

5) FAIL FAST approach  -  Schedule ( daily and then later hourly ) Jenkin Builds for API Integration Test project. Initiallyyou will see more failures on API Integration Test projects because “API Build” is still in development mode. Which is what the intention towards FAIL FAST approach! 

6) Feel Good - As the “API Build” project development progresses, you will see more tests passing on the “API Integration Tests” project. Feel good about it!  YES PLEASE.

7) Write Performance Test cases -  The moment you see some comfort on the “API Integration Test” build, Immediately GET your QA involved in writing Performance Testing test case scenarios. 

With the framework, I have used in my sample gitgub code, it is very easy to write performance test cases with it's simplest ever form using JSON and yes QA can do it very well and very quickly. They would just need NFR !

8) Introduce Integration Test Suites - Now, its time to write various Test Suites for testing logically related functionality together and independently.
Think of creating various test suites, for example -

A) Functionality Based Test Suites - something like Verify-ALLGET-Operations-TestSuiteVerify-ALLPOST-Operations-TestSuites, OR Verify-AccountCreationJounery-TestSuite wihch could involve account creation, fetch newly created account details, test 400, 404, 500 cases with account creation journey etc.

B) Performance based Test Suites - something like, Verify-GradualLoad-ALLGET-Operations-TestSuite ( increase load gradually with 5 sec gap, 2 sec gap, 0.2 sec gap etc ),
Verify-ParallelLoad-ALLGET-Operations-TestSuite ( increase load parallel - 100 requests in 100secs i.e. each request in 1 sec gap, looping twice, meaning 200 parallel requests)

9) FAIL-FAST again on Performance Test now! -  See more failures on API Integration Test project for Load Test Suites.  Fix issues on API Build project and reduce failures.

10) Feel Good again on Performance Test - As you fix issues, you will definitely see more confidence on your application on the performance side.

11) Add more and more tests to API Integration Tests project, Fail again, Feel good again, and keep it RUNNING!

Using the code

I have explored effective and efficient way of writing integration and performance test cases with an open source framework.  Please follow details.
I have developed a very simple REST API using Spring Boot, Spring Data, H2 In-memory DB with Maven.

Clone sample project from my GitHub account https://github.com/BeTheCodeWithYou/SpringBoot-ZeroCode-Integration

Once you clone, go to your local repo and run below
mvn clean install

check the test results in /target folder

running the application
Java -jar SpringbootRestInMemoryDB-1.0.0-SNAPSHOT.jar.jar

Code walk-through

Once you import the project into IDE, it will look like as below. Highlighted once are the integration tests related code. That’s all and easy!


1) add dependency
   
    <dependency>
      <groupId>org.jsmart</groupId>
      <artifactId>zerocode-rest-bdd</artifactId>
      <version>1.2.6</version>
      <scope>test</scope>
    </dependency>

refer list of available versions here ZeroCode Maven Central 


2) src/test/java  - Organize integration test cases in faster ever possible way!

   2.a) /integrationtests - TestGetOperations.java
            
As you see below, you just need to provide JSON file location, where the actual test case preset with asserts and this is the JSON, which will be created by QA as I mentioned in point 2.b in the solution approach section above. You will see all the details about @TargetEnv and @RunWith on the github with README.md
    

 2.b) /testconfig -  Custom class which runs spring app. you will just need to write start method in you spring main class.


Spring main class with start method, being called by E2eJunitRunner above


 2.c) / testsuite - This runs the entire test suite i.e. picking all tests under "resources/integration_tests" folder and sub-folders.

 As you see below, @EnvProperty is very interesting here. It allows you to run your test suite against multiple environments without any code change. All details are on the github with REAME.md file.
      

3) src/test/resources -  Write Test cases in JSON formats for your API end points with assertions. Plenty of variations available for assertions of the response body, headers, custom response headers etc

One sample ( /reintegration_tests/get/get_new_parkrunner_by_parkrunid_test.json ) here from the project looks like this. You can see that request and response body can be re-used very easily.


4) Reports - See your test reports from the /target folder. Very interactive reports.


Thanks for your time and hope you finds this article useful as best practice for developing your API's.
Feel free to provide comments and suggestions on improving this best practice